Tuesday, March 29, 2016

Using Embedded Packet Capture on CSR1000v

Whether the goal is to analyze why something isn't working correctly by capturing data plane traffic or you want to understand a protocol utilizing Wireshark, there is a fairly simple way to do this.

EPC or embedded packet capture is like running SPAN on a router, yes this is possible but only on the primary interfaces. See below. EPC allows you to capture both directions, and for multiple AFI, IPv4 and IPv6 and on subinterfaces!

R1(config-mon-local)#source interface gigabitEthernet 1. - You can't SPAN a subinterface on a router. So for those utilizing ESXi for CCIE R&S or SPv4 prep like I do, EPC is your alternative.

The other issue you have is if the traffic is in the data plane of the router, the router is forwarding the traffic nor is the traffic destined for the router, then debugging won't work either. You could write an ACL to permit ip any any log, but that's hard on the CPU. Plus you'll see part of what you want anyways so, EPC is the way to go.

So how do we get this thing working anyway. Easy! There a few steps that need to be taken first before you just start sending traffic to the wireshark machine.

SIDEBAR, these are recommendations, not requirements!

First you'll need to set a limit of how much to capture. You'll be saving the capture in IO memory on the router until you have export it.

R1#monitor capture blog buffer size 10 - "blog" is the name of the capture

Second, you'll want to specify a circular buffer, this means that after 10MBs of capture data, the older data will be overwrote.

R1#monitor capture blog buffer circular

Third, you'll want to specify the interface to do the capturing on, the direction of the capture and what to capture.

R1#monitor capture blog interface gigabitEthernet 1.12 both any

Now, that's a step by step to just get ready to start capturing. You also have a one liner available:

R1#monitor capture blog buffer size 10 circular interface g1.12 both match any

Now we need to start the capture.

R1#monitor capture blog start
R1#
*Mar 29 23:28:18.126: %BUFCAP-6-ENABLE: Capture Point blog enabled.

Send some traffic over that link:

R1#ping 10.1.2.2 repeat 10
Type escape sequence to abort.
Sending 10, 100-byte ICMP Echos to 10.1.2.2, timeout is 2 seconds:
!!!!!!!!!!
Success rate is 100 percent (10/10), round-trip min/avg/max = 1/7/50 ms

Stop the capture now, you don't have to do this, but if you don't and you start an export, there will be a steady stream of capture data sent to the TFTP server. The only way to stop it is to close the TFTP server.

R1#monitor capture blog stop
R1#
*Mar 29 23:29:04.817: %BUFCAP-6-DISABLE: Capture Point blog disabled.

Now let's export the capture and import it to Wireshark!

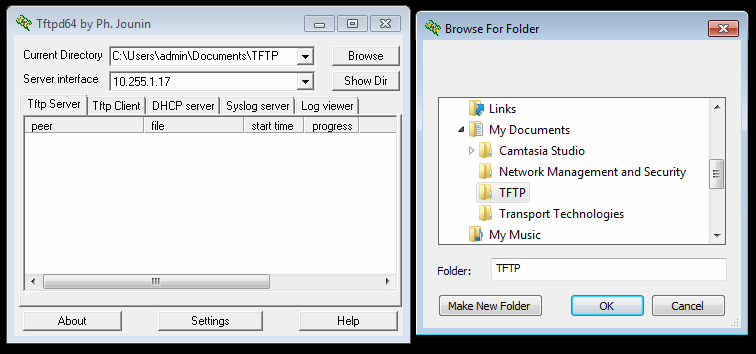
R1#monitor capture blog export tftp://10.255.1.17/R1R2PINK.pcap
!
Exported Successfully


Open that file in Wireshark by double clicking on it.


And as you can see, the ping was captured successfully.

Thanks for reading!

Rob Riker, CCIE #50693


Using TFTP to download and upload files from Cisco IOS Routers

One thing I often struggled with when I first got into Cisco Networking prior to having a CCNA was uploading and downloading files from the routers and switches. Fear Not! I have a solution! It's really easy to use. The idea is that you can use the existing IP network to upload files or download files from your network devices, rather easily I might add.

TFTP or Trivial File Transfer Protocol utilizes UDP port 69 to send traffic to and from TFTP enabled devices. First thing you'll need is TFTPD32. Download by clicking on the link. Then you'll need to make sure your device can reach the laptop/computer/server you installed TFTP on and the TFTP port - UDP 69 is open and listening

R1#sh ip int br
Interface              IP-Address      OK? Method Status                Protocol
GigabitEthernet1       10.255.1.38     YES DHCP   up                    up    

R1#ping 10.255.1.17
Type escape sequence to abort.
Sending 5, 100-byte ICMP Echos to 10.255.1.17, timeout is 2 seconds:
.!!!!
Success rate is 80 percent (4/5), round-trip min/avg/max = 1/1/1 ms

The . in the !!!! is the ARP resolution, you can ignore that.

Now what we'll need to do is copy the configuration from flash to TFTP. But first we need to tell the TFTP server where to store the files, essentially we need to give it a directory to download to and upload from. Click browse and navigate to the appropriate file. The Show Dir will show the contents of that folder.


R1#copy flash:iosxe-remote-mgmt.03.15.00.S.155-2.S-std.ova tftp:
Address or name of remote host []? 10.255.1.17
Destination filename [iosxe-remote-mgmt.03.15.00.S.155-2.S-std.ova]


The file is now being downloaded to the TFTP server as a potential backup. In this case, I don't need the file, this was for demo purposes, but you can see that you can download any file from flash or upload a file to flash. Like a new or backup IOS image. I often will keep the IPBase or other vanilla IOS image in flash, if space permits, and then upload the IOS image I intend to use and keep them both in flash.

If you accidentally choose the wrong interface or directory on your TFTP server, the network device will display the following, it's not a dead giveaway why the transfer failed but it's 1 possibility.

R1#copy flash:CCNPSP.conf tftp:
Address or name of remote host []? 10.255.1.17
Destination filename [CCNPSP.conf]?
%Error opening tftp://10.255.1.17/CCNPSP.conf (Permission denied)

Now we'll fix the interface and the directory on the TFTP server and download the configuration file.

R1#copy flash:CCNPSP.conf tftp:
Address or name of remote host []? 10.255.1.17                
Destination filename [CCNPSP.conf]?
!!
1465 bytes copied in 0.101 secs (14505 bytes/sec)

Now we'll upload the config file, essentially just reversing the process.

R1#copy tftp:CCNPSP.conf flash:
Address or name of remote host []? 10.255.1.17
Destination filename [CCNPSP.conf]?
%Warning:There is a file already existing with this name
Do you want to over write? [confirm]
Accessing tftp://10.255.1.17/CCNPSP.conf...
Loading CCNPSP.conf from 10.255.1.17 (via GigabitEthernet1): !
[OK - 1465 bytes]

1465 bytes copied in 0.067 secs (21866 bytes/sec)

And That is really it.

Thanks for reading!

Rob Riker, CCIE #50693


Saving your IOS configuration in Flash rather than the Start up Configuration

Most people that need to save their configuration use "wr mem" or "copy run start" and go about their way. That works and is a classic way to save your config. But for those of us that are not in the set it and forget it mode and need to modify configs on a regular basis, like CCNA prep for instance. We have this nifty configuration option, the "copy run flash:FILENAME.conf".

This gives the ability to save the current configuration in flash but not in the start up configuration. The benefit is that when you need to learn something new or your just getting bored with learning BGP, you can save your config's with "copy run flash:FILENAME.conf" and reload the box. This works on both Routers and Switches of the physical kind, in VIRL and with VMs like CSR1000v and IOS-XRv in ESXi.

When you want to load a saved configuration you can use the "configuration replace flash:FILENAME.conf, answer yes and your saved configuration is loaded!

So how does it work? Simple!

R1#copy run flash:CCNPSP.conf < enter key
Destination filename [CCNPSP.conf]? < enter key
%Warning:There is a file already existing with this name
Do you want to over write? [confirm] < enter key
1463 bytes copied in 0.166 secs (8813 bytes/sec)

R1#dir
Directory of bootflash:/
   20  -rw-             1463  Mar 29 2016 22:23:45 +00:00  CCNPSP.conf

R1#more flash:CCNPSP.conf < will display a text output of the saved configuration file

version 15.5
service timestamps debug datetime msec
service timestamps log datetime msec
no platform punt-keepalive disable-kernel-core
platform console serial
!
hostname R1
!
< output deleted for brevity>

Now, you can reload your device and rest safely knowing that your hard work has not been lost. OK, now your device is backup, or maybe it was power cycled when you were working on something else, processes hang and stuff happens. Not to worry, lets load the that file up!

R1#configure replace flash:CCNPSP.conf < This will replace the running configuration with the saved file in flash!

This will apply all necessary additions and deletions
to replace the current running configuration with the
contents of the specified configuration file, which is
assumed to be a complete configuration, not a partial
configuration. Enter Y if you are sure you want to proceed. ? [no]: yes
Total number of passes: 0
Rollback Done

R1#
*Mar 29 22:29:30.499: Rollback:Acquired Configuration lock.

And there you have it. Your previously saved configurations are now loaded to the running configuration. Your limit of saved files is how much space is available in flash.

R1#dir
Directory of bootflash:/
<output deleted for brevity>
7835619328 bytes total (6516903936 bytes free)

This is a virtual machine running in ESXi 6.0 so I have about 8 GB HDD space allocated, not running out of room anytime soon!

Thanks for Reading, hope this was helpful and informative for you!

Rob Riker, CCIE #50693